Appearance
Ybug + WordPress
Installing Ybug on your WordPress site
To install our Feedback Widget plugin on your WordPress site, follow these simple steps.
1. Ybug: copy your Project ID
Go to your Ybug dashboard. Select the project from the dropdown menu in the top-left corner, navigate to the widget configuration tab, and locate your Project ID. Copy it — you'll need it in the next step.

2. WordPress: install the plugin
2.1 Go to your WordPress admin dashboard, navigate to the Plugins section, and click Add New Plugin.

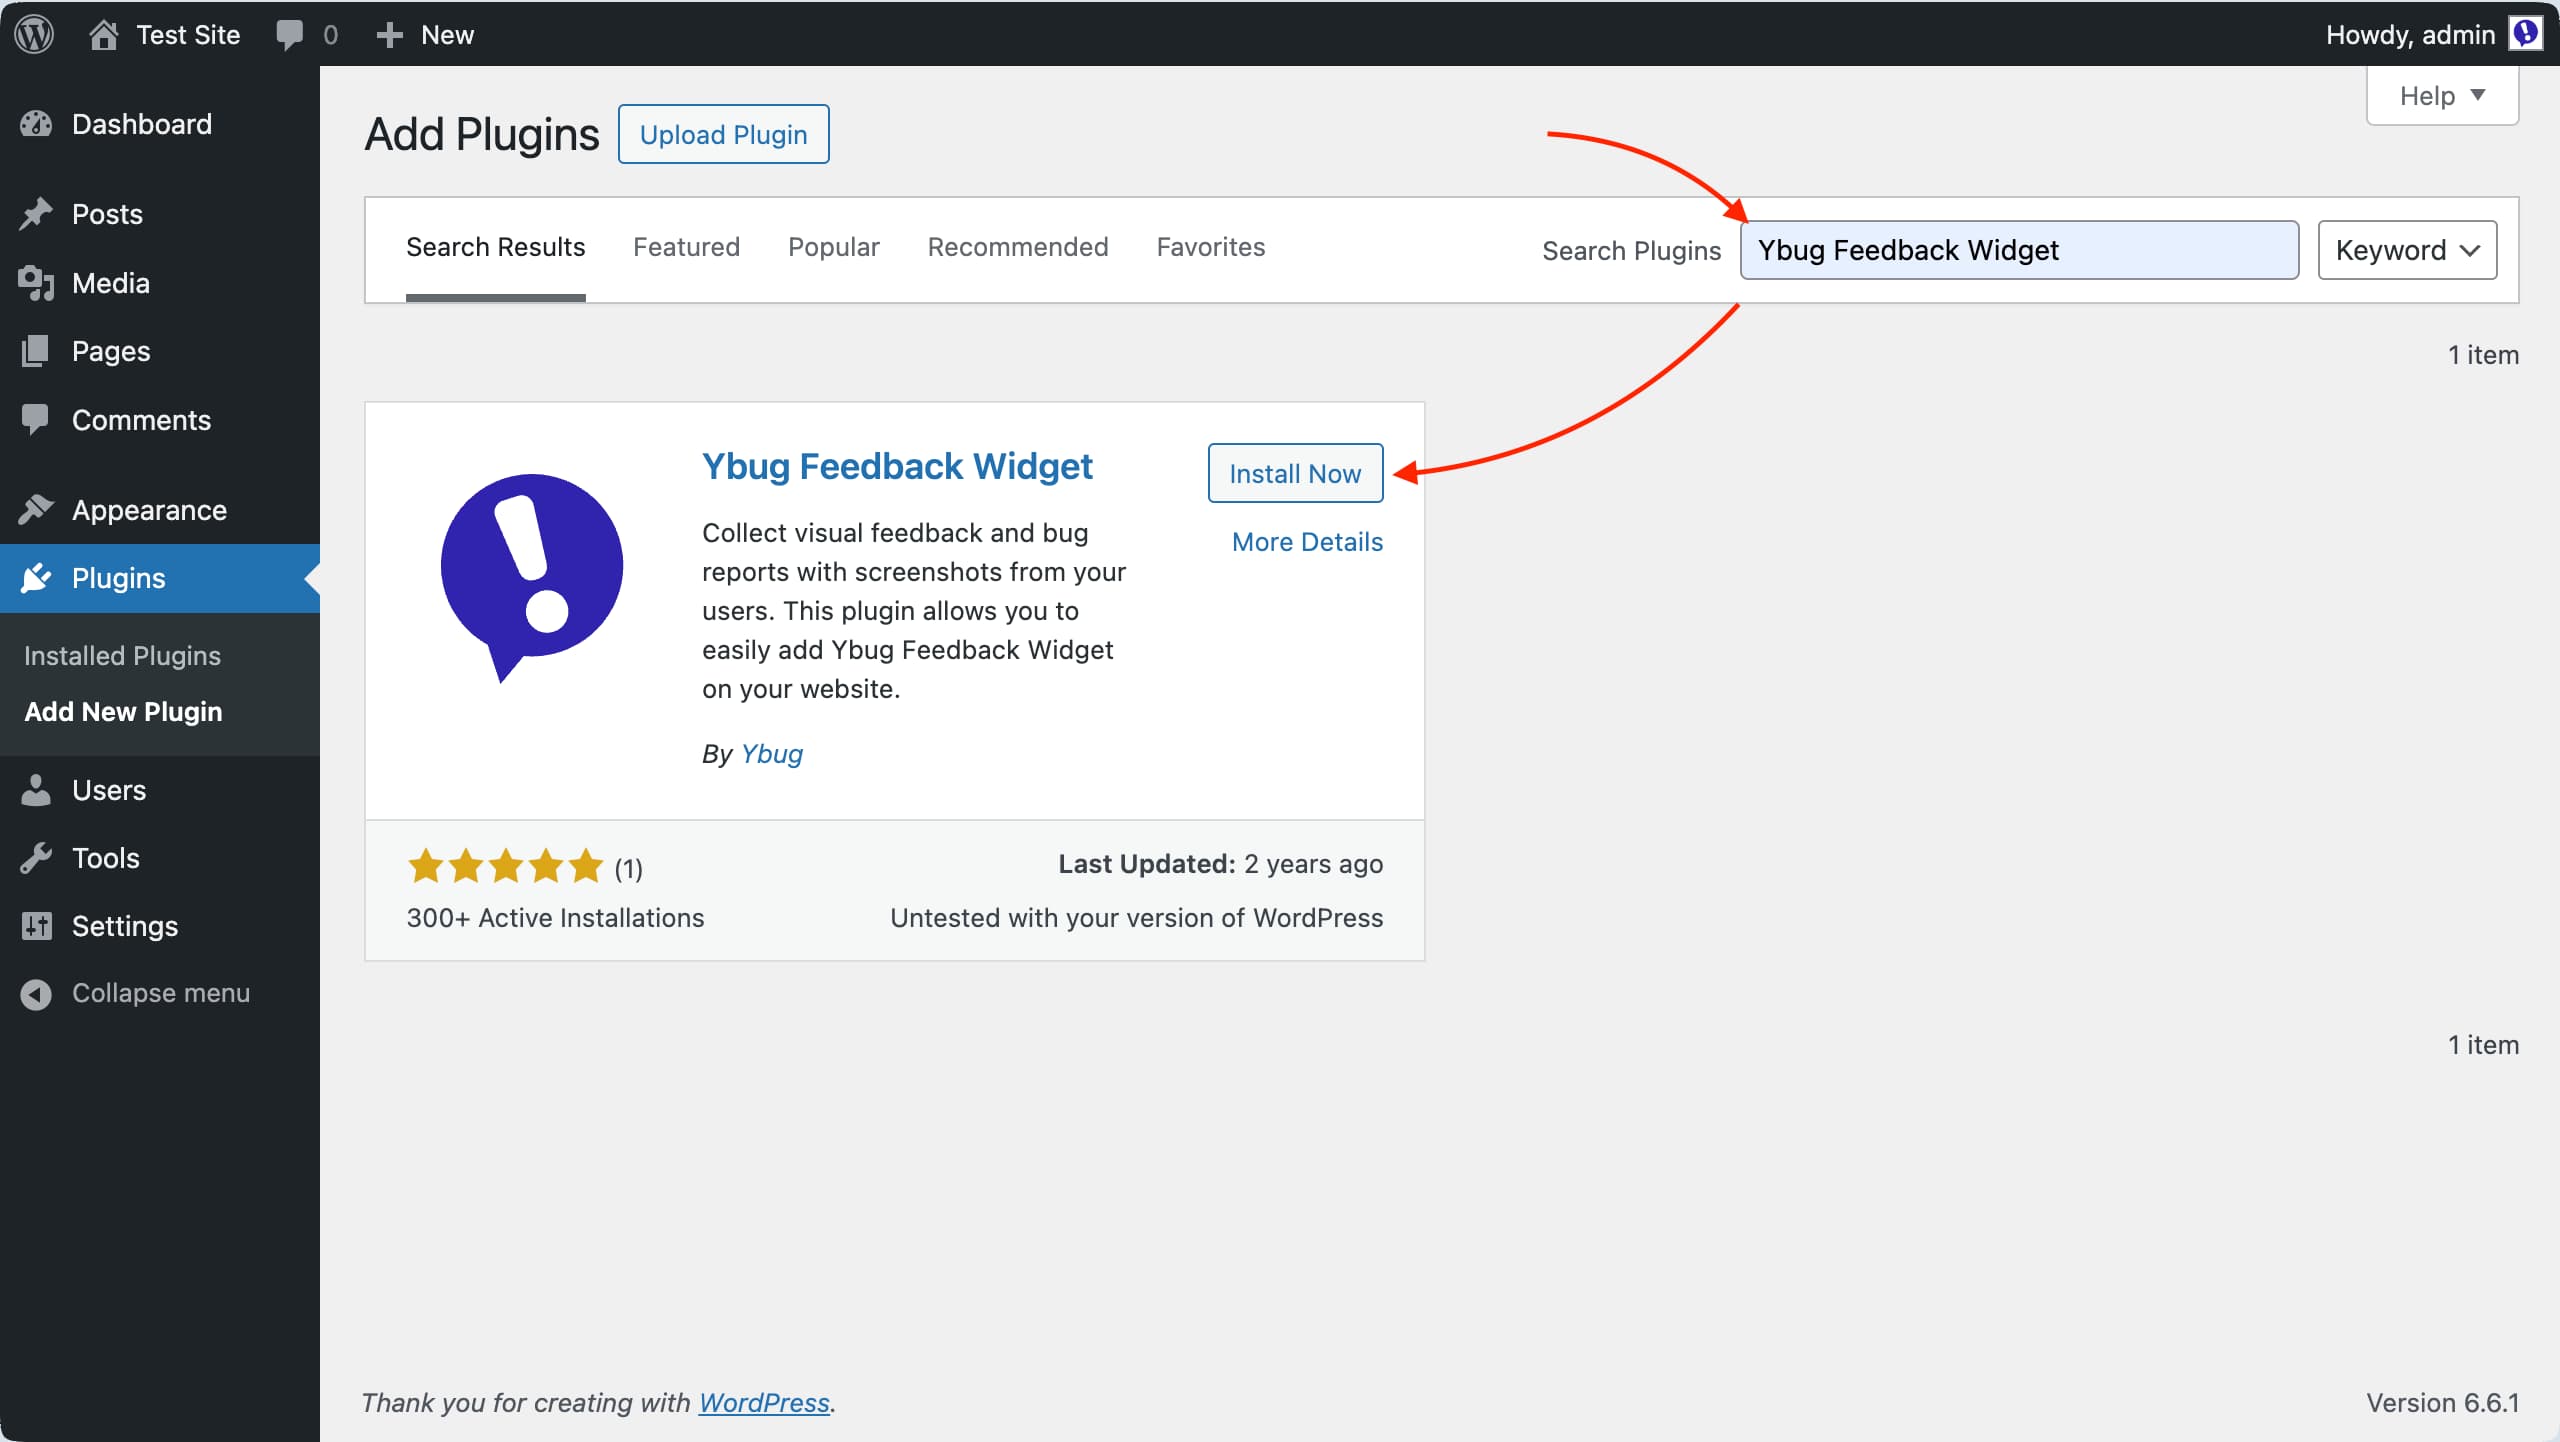
2.2 In the search bar, type "Ybug Feedback Widget", find the plugin in the search results, and click Install Now.
2.3 Once installed, click Activate to enable the plugin on your site.
3. WordPress: configure the plugin
3.1 After activation, go to the plugin settings page by navigating to Settings → Ybug Feedback Widget.
3.2 Paste your Project ID (copied earlier) into the designated field.

3.3 Confirm your configuration by clicking Save Changes.
3.4 Visit your site (refresh the page if needed), and you should see the Feedback button live.
4. WordPress: restrict feedback button access
Our WordPress plugin offers flexibility in who can see the Feedback button. By default it's visible to everyone, but you can adjust the settings to restrict access:
- Everyone: show the Feedback button to all visitors (default).
- Logged-in users: restrict visibility to users who are logged in.
- By user role: limit the Feedback button to specific user roles, such as Admins or Editors.
Configure these settings on the plugin settings page under the Restrict Access section, then click Save Changes.