Appearance
SAML Single Sign-On (SSO) with Azure AD ENTERPRISE
Enterprise feature
Single Sign-On is available on our Enterprise plan. If you'd like to learn more about the Enterprise plan, please contact us.
To set up Single Sign-On with Azure Active Directory (Azure AD), you'll need permissions to create and manage a new Azure AD application.
1. Prepare Ybug for SSO configuration
1.1 Before you can set up the Azure AD SSO application, open the Single Sign-On settings page in Ybug. Go to your Team account settings page, click the Single Sign-On tab and check the Enable Single Sign-On checkbox. Leave this window open — you'll need this information to complete the configuration of the Ybug app in Azure AD.

2. Set up Azure AD for Ybug
2.1 Sign in to the Azure portal using your Azure Active Directory administrator account.
2.2 Navigate to Enterprise applications, select New application:

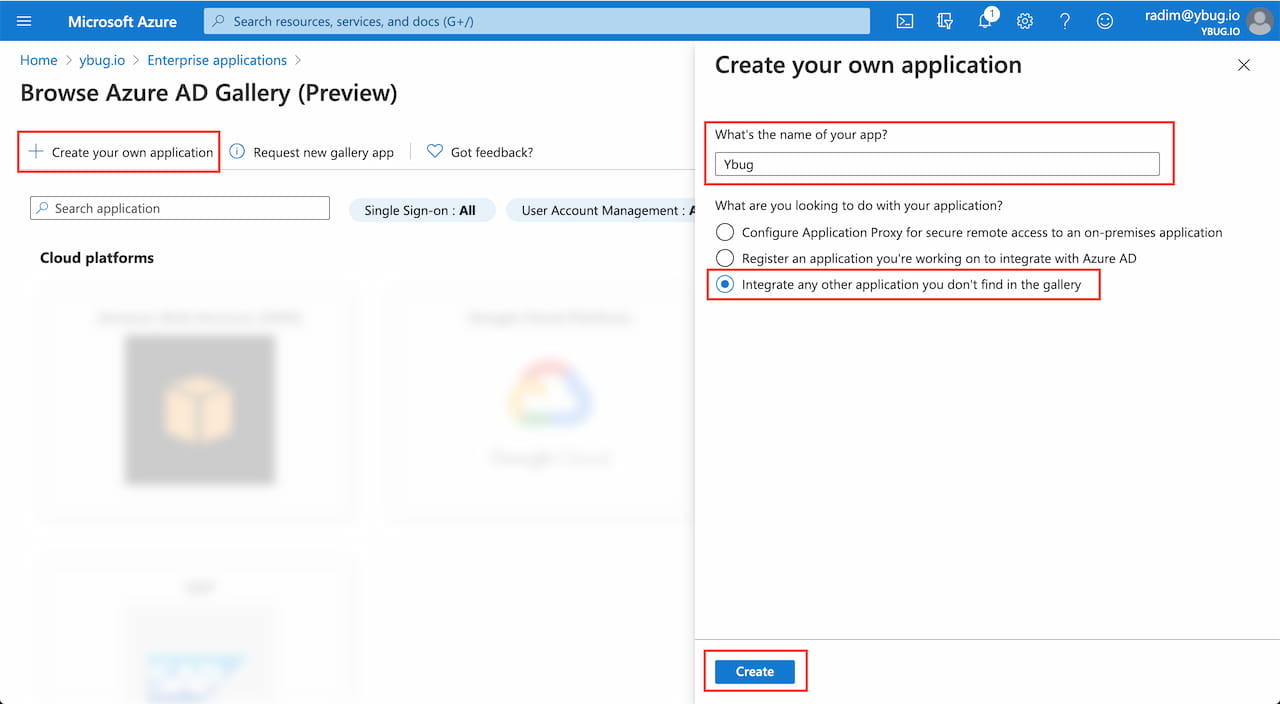
2.3 As Ybug is not yet listed in the Azure Active Directory marketplace, you need to Create your own application. Enter the name of the application, keep Integrate any other application you don't find in the gallery selected and click Create:
2.4 After your new application is created, go to the Single sign-on section and select SAML from the available options:

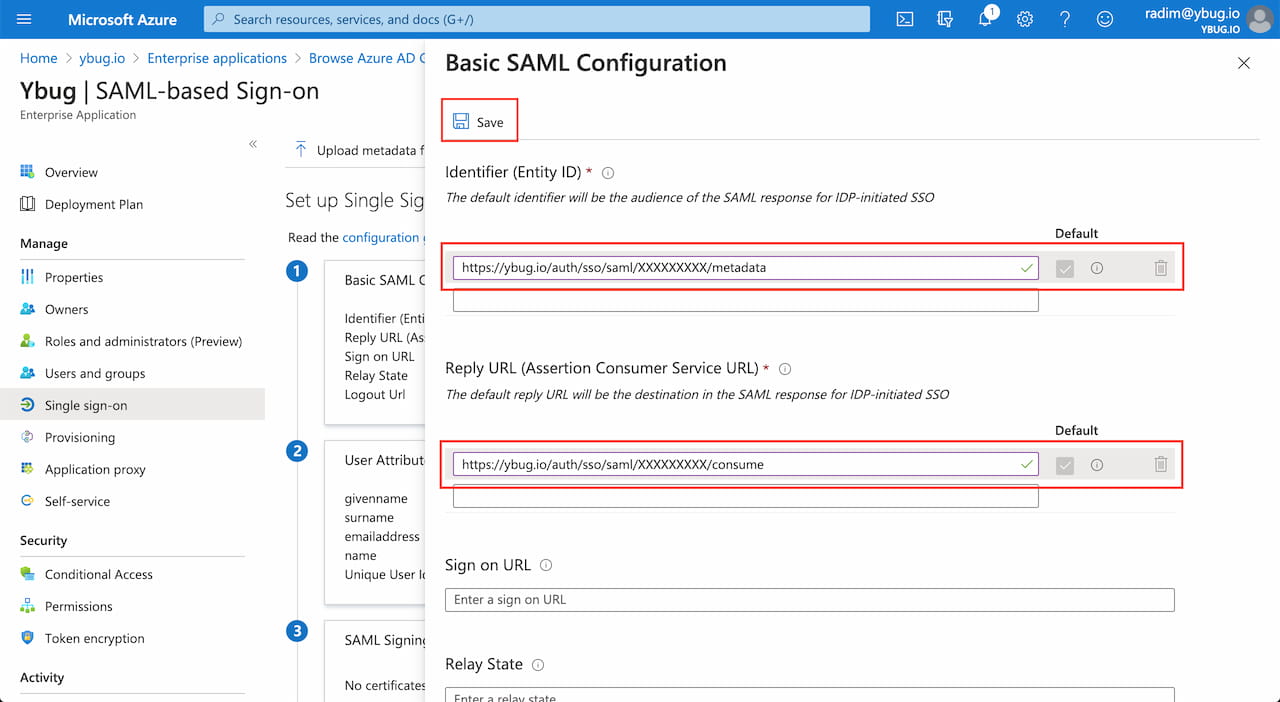
2.5 Click Edit on the Basic SAML Configuration pane:

2.6 Configure the SAML integration. Enter the Ybug service provider details from the Ybug Single Sign-On page (from Step 1). Then click Save.
| Field (in Azure AD) | Value (from Ybug) |
|---|---|
| Identifier (Entity ID) | Entity ID |
| Reply URL (Assertion Consumer Service URL) | Assertion Consumer Service URL |
2.7 Set Unique User Identifier to user.mail:

3. Set up Ybug
3.1 In Azure AD on the Set up Ybug section, click the View step-by-step instructions link. Follow the step-by-step instructions and enter the SAML Single Sign-On Service URL / SAML Entity ID into Ybug. Download the Base64-encoded SAML Signing Certificate and paste its contents into Ybug's Certificate field.
| Field (in Ybug) | Value (from Azure AD) |
|---|---|
| Entity ID | SAML Entity ID |
| SSO URL | SAML Single Sign-On Service URL |
| Certificate | Contents of SAML Signing Certificate (Base64-encoded) |


3.2 In Ybug, click Save SSO Settings to enable Single Sign-On.
4. Assign users
Assign users or groups to your new Ybug SAML application in Azure AD. For more information, see the official Azure AD documentation.
Final steps
After successfully setting up SSO, your users should be able to sign in or sign up using your Identity Provider.
- Team members (not owners) with an existing Ybug account using the same email address as their SSO account will be switched to SSO authentication after their first SSO login.
- For users without a Ybug account yet, a new Ybug account is provisioned the first time they log in (from their Identity Provider).