Appearance
Productboard
Want the overview first? See the Productboard integration overview.
How to set up
Configuration is per-project in Ybug. To integrate your Ybug project with Productboard, go to your dashboard and follow these simple steps:
1. Go to the Integrations section in your project settings.
2. Click the On/Off switch in the Productboard row.
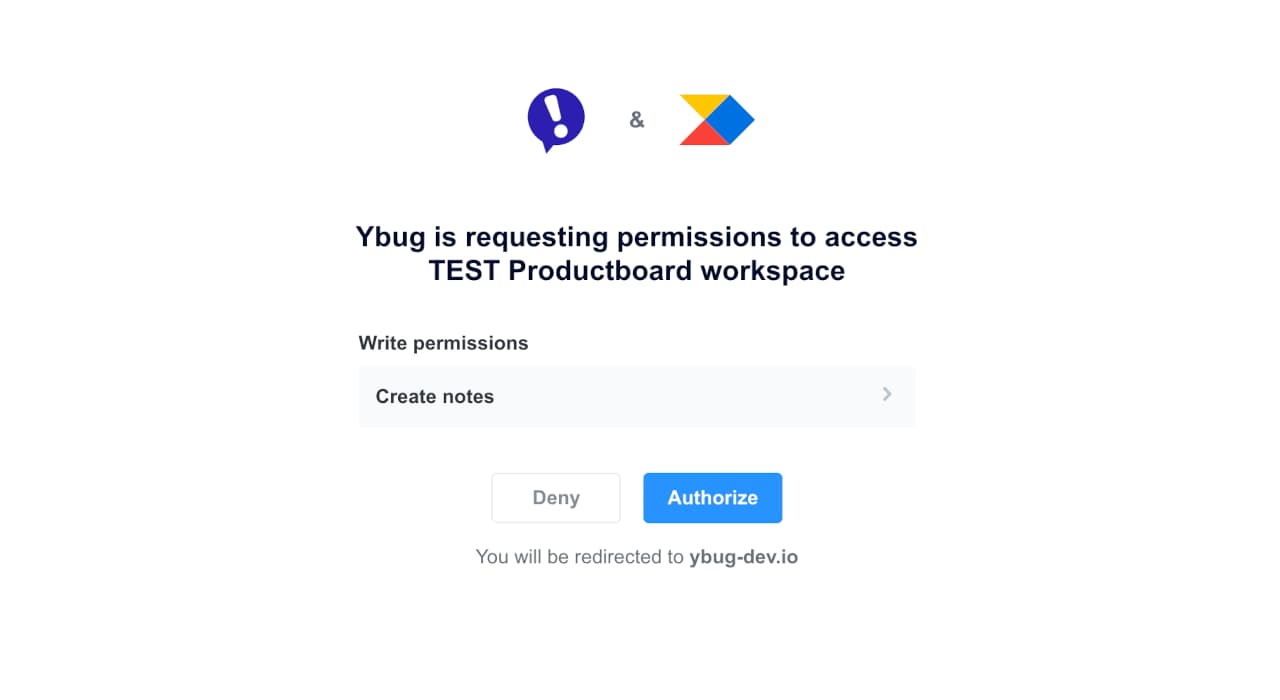
3. Sign in to your Productboard workspace and authorize Ybug app by clicking the Authorize button.
4. To allow better filtering, you can list some tags that should be assigned to the feedback pushed to Productboard.

5. And that's it! Once the integration is enabled, any feedback sent with Ybug is automatically sent to Productboard. You should find the new feedback in the Insights section.

Advanced settings
Note title
You can adjust the note title field format to better adhere with your current workflow. The default note title format is [{{projectName}}] #{{reportId}} {{reportTitle}}.
You can use these variables:
{{projectName}}— name of the project{{reportId}}— report ID in Ybug{{reportTitle}}— report title in Ybug{{reporterName}}— name of the reporter (if provided){{reporterEmail}}— email address of the reporter (if provided)
Task description
It is also possible to adjust what information will be included in the task description.
url— page URLreportedAt— feedback datetime in your preferred timezonereporter— reporter name and emailrating— feedback ratinglocation— approximate location (Country/Region/City), based on the user's IP addressuserData— custom user data passed to the Feedback Widgetos— operating systemscreen— screen dimensions (in pixels)viewport— viewport dimensions (in pixels)browser— browser name and versionuserAgent— user agent stringreferrer— referrer URLreportUrl— URL of the report in YbugscreenshotImage— display screenshot image directly in task description (in addition to screenshot added as a task attachment)
