Appearance
SAML Single Sign-On (SSO) with Okta ENTERPRISE
Enterprise feature
Single Sign-On is available on our Enterprise plan. If you'd like to learn more about the Enterprise plan, please contact us.
To set up Single Sign-On with Okta, you'll need administrator access to your Okta organization.
1. Prepare Ybug for SSO configuration
1.1 Before you can set up the Okta application, open the Single Sign-On settings page in Ybug. Go to your Team account settings page, click the Single Sign-On tab and check the Enable Single Sign-On checkbox. Leave this window open — you'll need this information to complete the configuration of the Ybug app in Okta.

2. Set up the Okta application
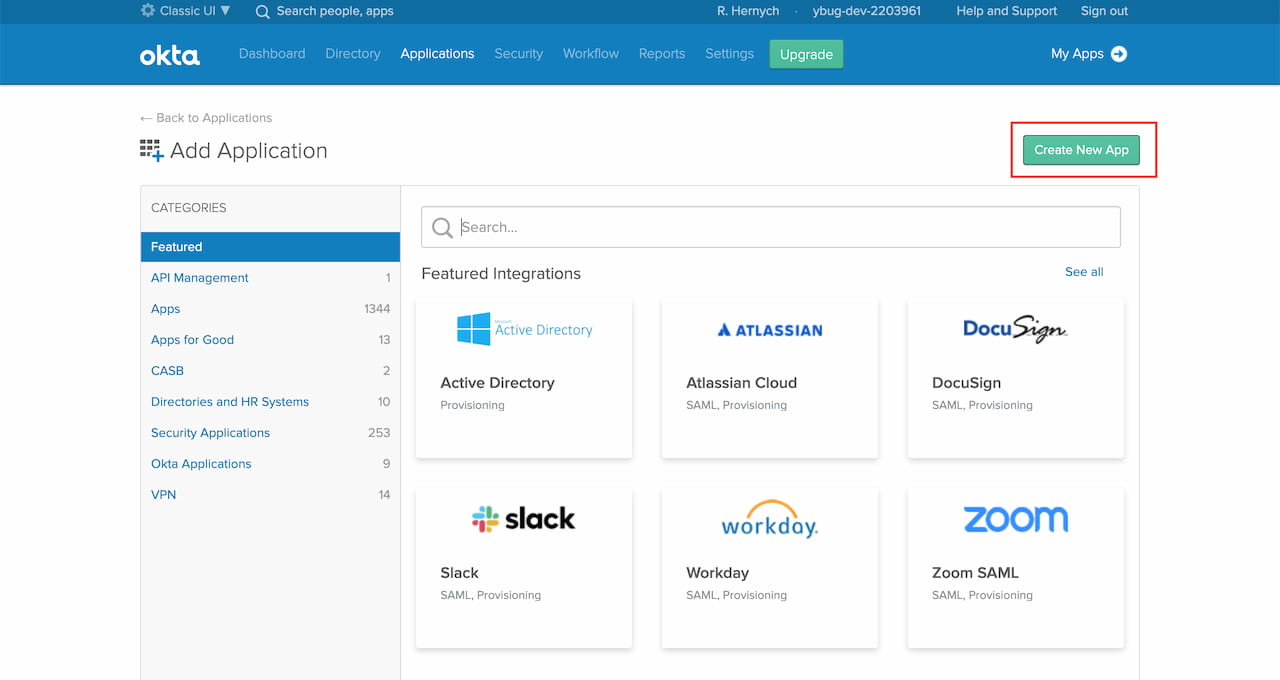
2.1 In your Okta Admin Dashboard, click Add applications.

2.2 On the following page, click Create New App.
2.3 Select Web as the platform and SAML 2.0 as the Sign-on method.

2.4 Enter App name Ybug, optionally upload a logo, and click Next.

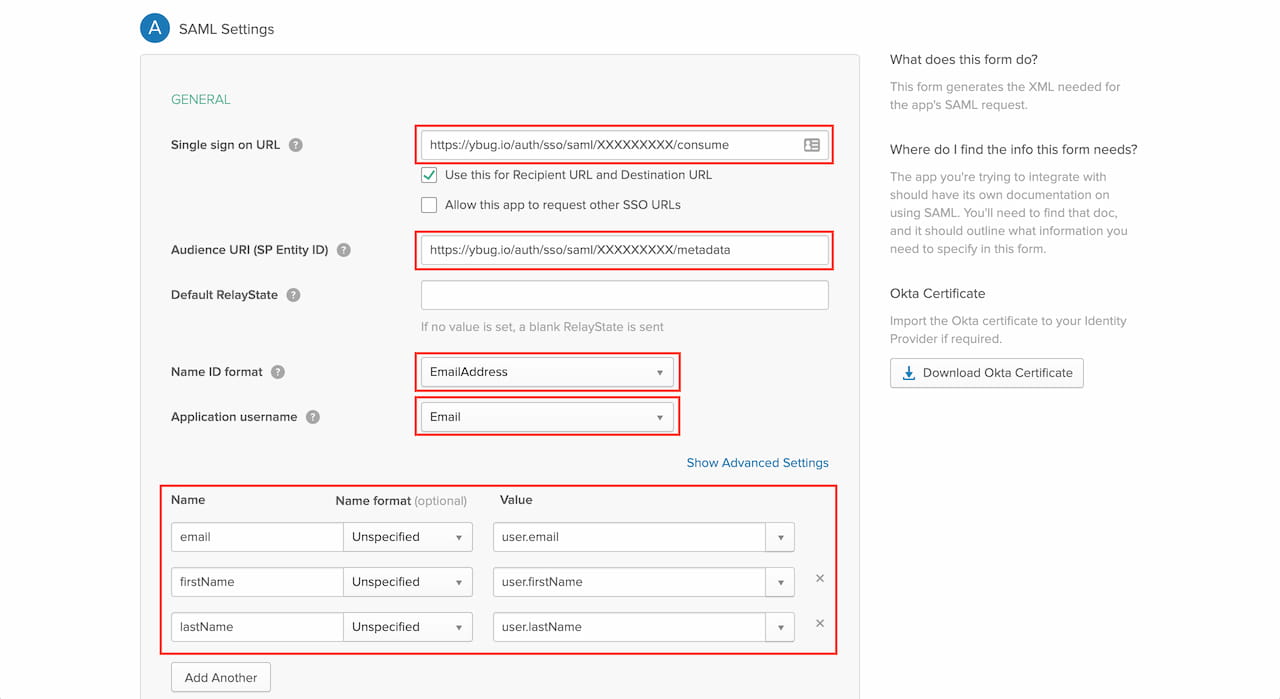
2.5 Configure the SAML integration. Enter the Ybug service provider details from the Ybug Single Sign-On page (from Step 1). Add the email, firstName and lastName attributes as shown in the screenshot.
| Field (in Okta) | Value (from Ybug) |
|---|---|
| Single sign-on URL | Assertion Consumer Service URL |
| Audience URI (SP Entity ID) | Entity ID |
| Name ID format | Select EmailAddress |
| Application username | Select Email |
2.6 Click Next, select I'm an Okta customer adding an internal app, then click Finish.
3. Set up Ybug
3.1 On the Okta application settings page, go to the Sign On section and click View Setup Instructions.
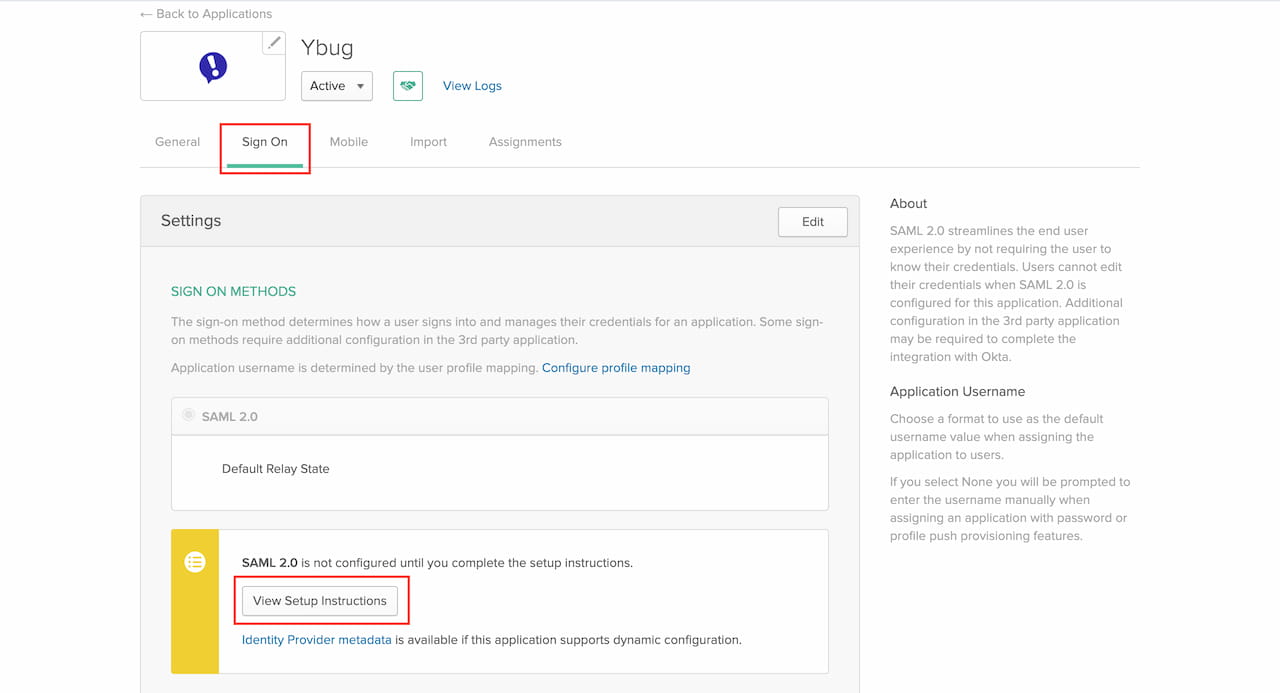
3.2 Copy the values of Identity Provider Issuer, Identity Provider Single Sign-On URL and X.509 Certificate into Ybug.
| Field (in Ybug) | Value (from Okta) |
|---|---|
| Entity ID | Identity Provider Issuer |
| SSO URL | Identity Provider Single Sign-On URL |
| Certificate | Contents of X.509 Certificate |

3.3 In Ybug, click Save SSO Settings to enable Single Sign-On.
4. Assign users
Assign users to your new Ybug SAML application in Okta.
Final steps
After successfully setting up SSO, your users should be able to sign in or sign up using your Identity Provider.
- Team members (not owners) with an existing Ybug account using the same email address as their SSO account will be switched to SSO authentication after their first SSO login.
- For users without a Ybug account yet, a new Ybug account is provisioned the first time they log in (from their Identity Provider).