New Feedback Widget plugin for WordPress
What’s in this article
Good news, everyone! The Ybug plugin for WordPress is finally here. It allows our WordPress users to install the Feedback Widget with just a few clicks.
If your website runs on WordPress, you no longer need to manually edit theme files or paste the widget snippet into templates. The plugin gives you a straightforward way to add Ybug to your site, connect it to your project, and start collecting visual feedback from visitors, clients, editors, or testers.
Why use a WordPress feedback plugin?
WordPress powers everything from personal blogs to ecommerce stores and business websites. That also means feedback can come from many different people: clients reviewing a redesign, editors checking content, customers reporting issues, or internal teams testing new pages.
Email and chat are not ideal for this. A message like “the image is wrong on the services page” still leaves your team asking for a screenshot, URL, browser, and more details. With Ybug, the reporter can submit feedback directly from the page and attach visual context automatically.
How to install
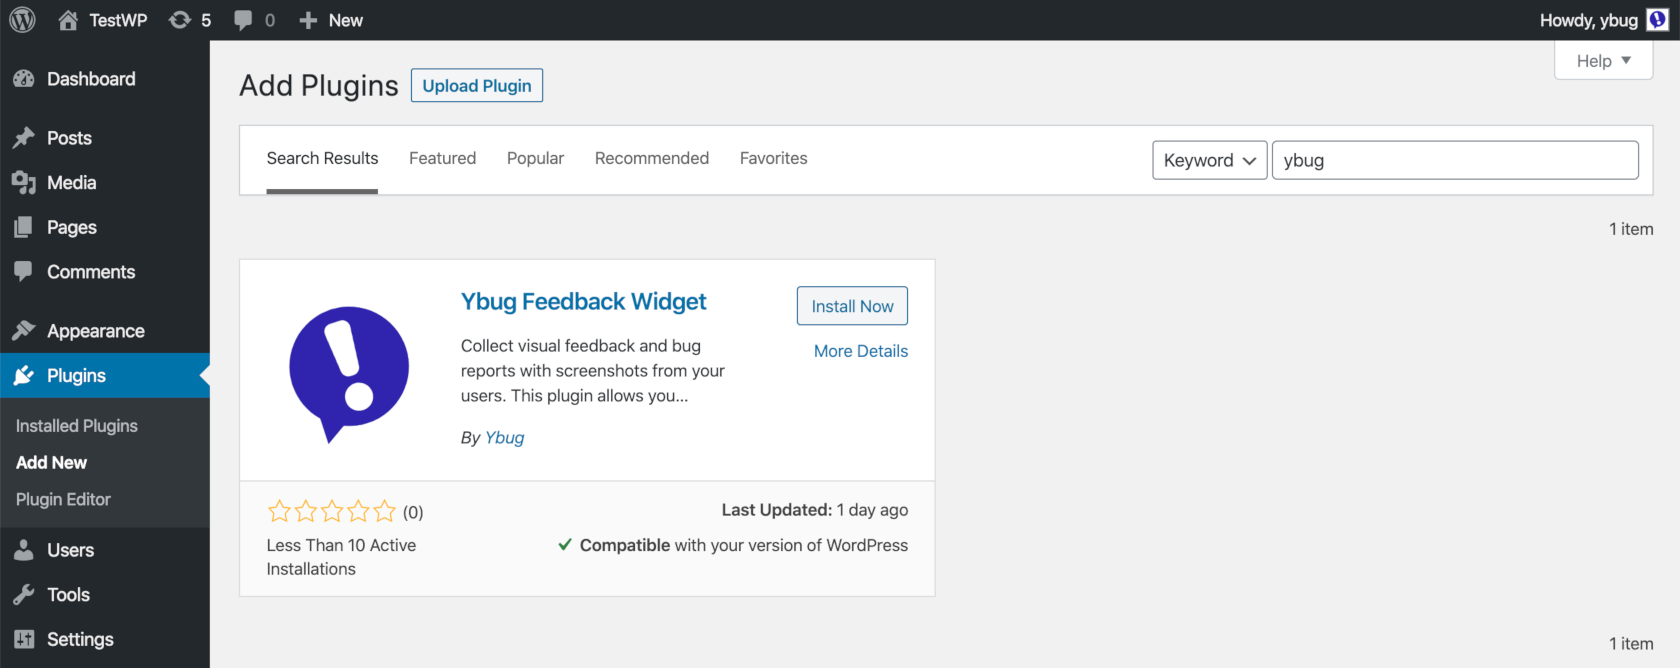
Go to the plugin manager in your WordPress admin panel and click the Add New button. Filter plugins by searching for “Ybug,” install the Ybug Feedback Widget, and then activate it.
How to setup
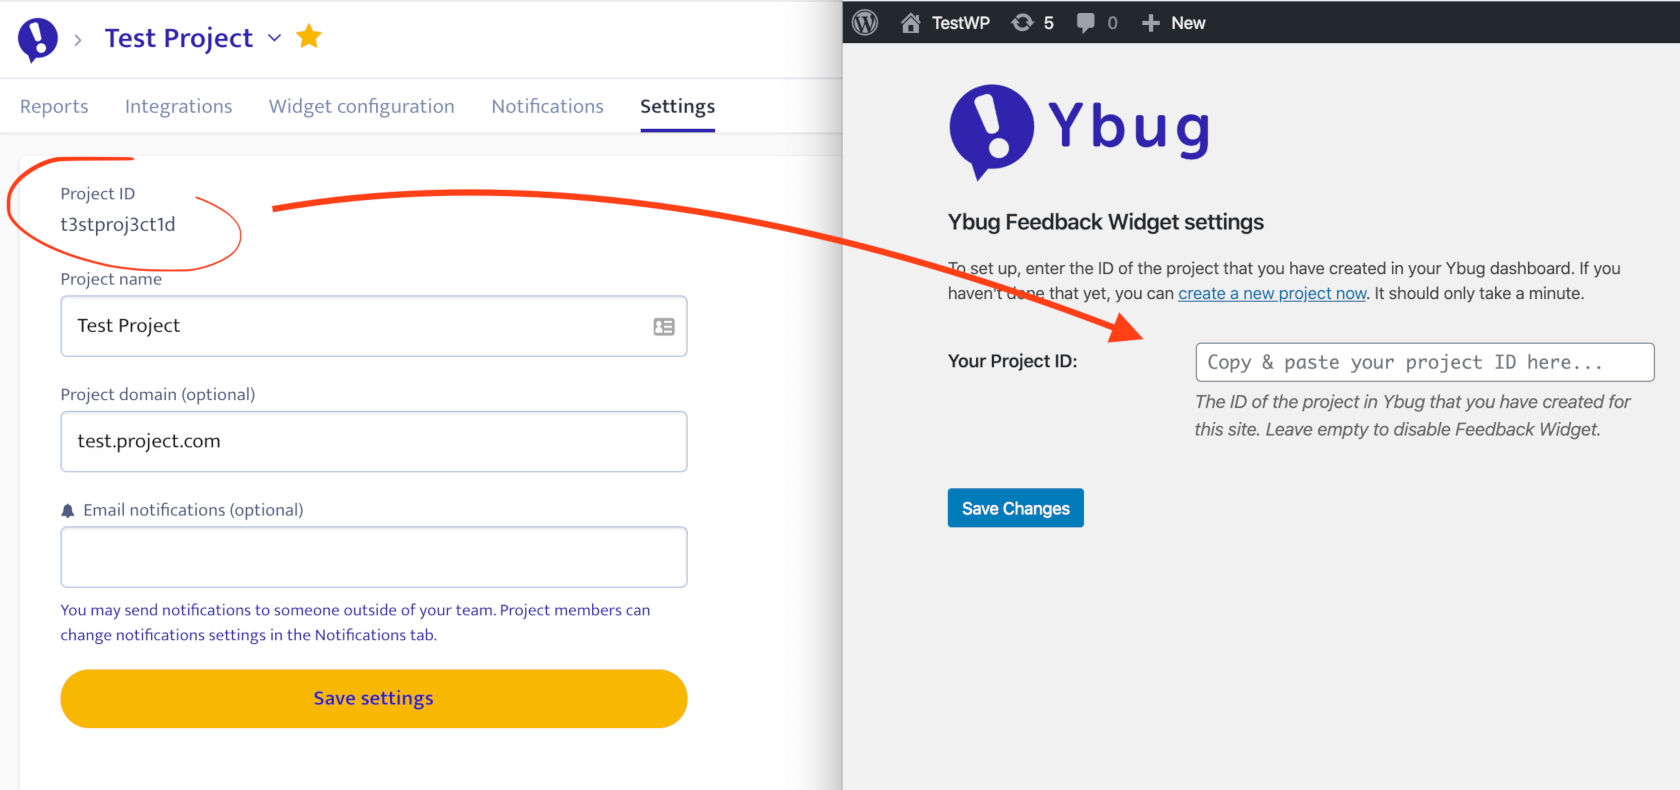
Configuration is very simple. After activating the plugin you will be redirected to the plugin settings page. Just enter the Project ID and save changes. The plugin is currently very simple, and you can always customize the widget in your Ybug dashboard.
Where to find your Ybug Project ID
Your Project ID is available in your Ybug dashboard. Open the project you want to connect to WordPress and look for the installation or widget settings. Copy the Project ID, paste it into the WordPress plugin settings, and save.
After saving, open your website in a new browser tab and check that the feedback widget appears as expected. It is a good idea to submit one test report so you can confirm that feedback arrives in the correct Ybug project.
What you can collect with Ybug on WordPress
- Bug reports from visitors who notice something broken.
- Design feedback from clients reviewing a new layout.
- Content comments from editors and marketing teammates.
- QA notes from testers checking a staging site before launch.
- Usability feedback from customers who get stuck on a page.
Example: reviewing a WordPress redesign
Imagine an agency preparing a redesigned WordPress site for a client. Instead of collecting comments in a document or asking the client to send screenshots by email, the agency can install Ybug on the staging site. The client clicks the widget, marks the exact section that needs a change, and submits the comment.
The agency receives a visual report with the page URL and browser details, making the feedback easier to understand and faster to assign.
Tips for a clean WordPress setup
- Use a separate Ybug project for staging and production if you want to keep testing feedback apart from live visitor feedback.
- Customize the widget text in your Ybug dashboard so it matches your site. For client review, “Leave a comment” may work better than “Report a bug.”
- Check visibility after theme changes. If you switch themes or add optimization plugins, verify that the widget still loads correctly.
- Connect integrations if your team wants WordPress feedback sent to tools like Trello, Jira, ClickUp, Slack, or Microsoft Teams.
- Submit a test report after installation, plugin updates, or major website changes.
Start collecting better WordPress feedback
The Ybug Feedback Widget plugin gives WordPress teams a faster way to collect actionable feedback without custom code. Install the plugin, paste your Project ID, and your visitors, clients, or testers can start reporting issues with screenshots and page context. Happy blogging!
