Appearance
Ybug + Bubble
Installing Ybug on your Bubble site
To install our Feedback Widget plugin on your Bubble application, follow these simple steps.
1. Ybug: copy your Project ID
Go to your Ybug dashboard. Select the project from the dropdown menu in the top-left corner, navigate to the widget configuration tab, and locate your Project ID. Copy it — you'll need it in the next step.

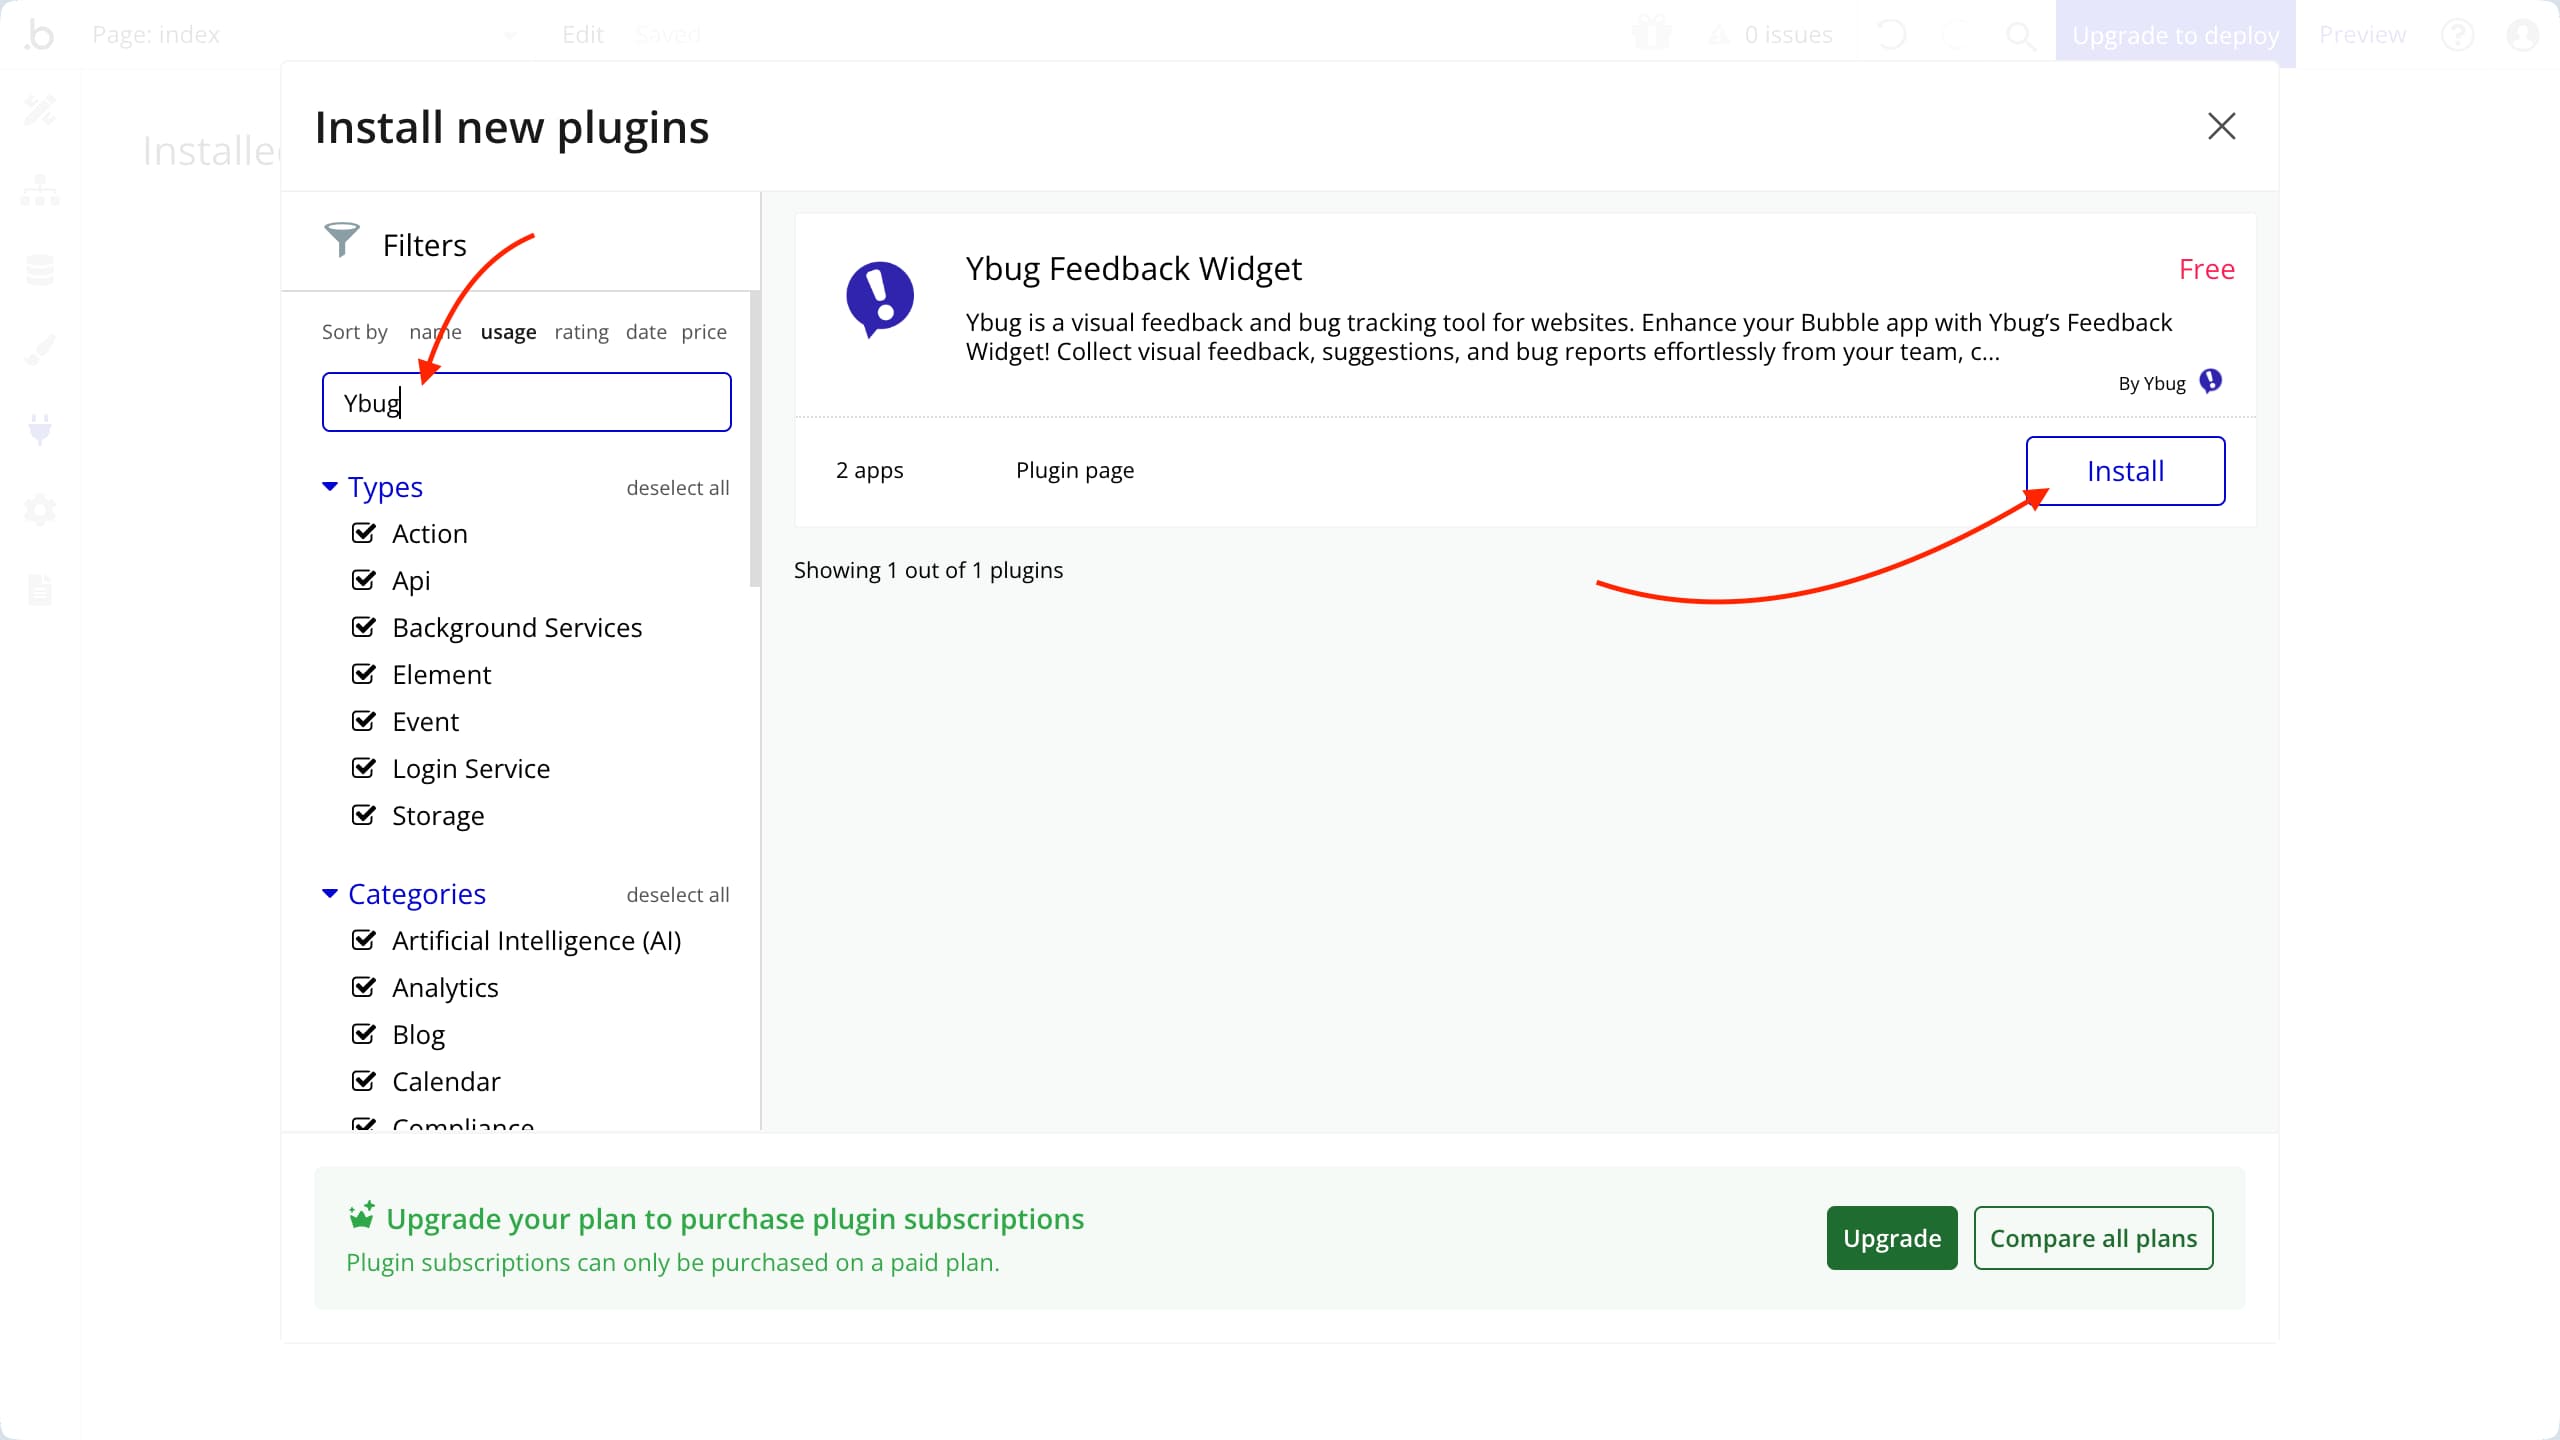
2. Bubble: install the Ybug Feedback Widget plugin
2.1 Go to your Bubble app's editor and navigate to the Plugins tab.
2.2 Click Add plugins to open the plugin marketplace.
2.3 Search for "Ybug Feedback Widget" and click Install to add the plugin to your application.
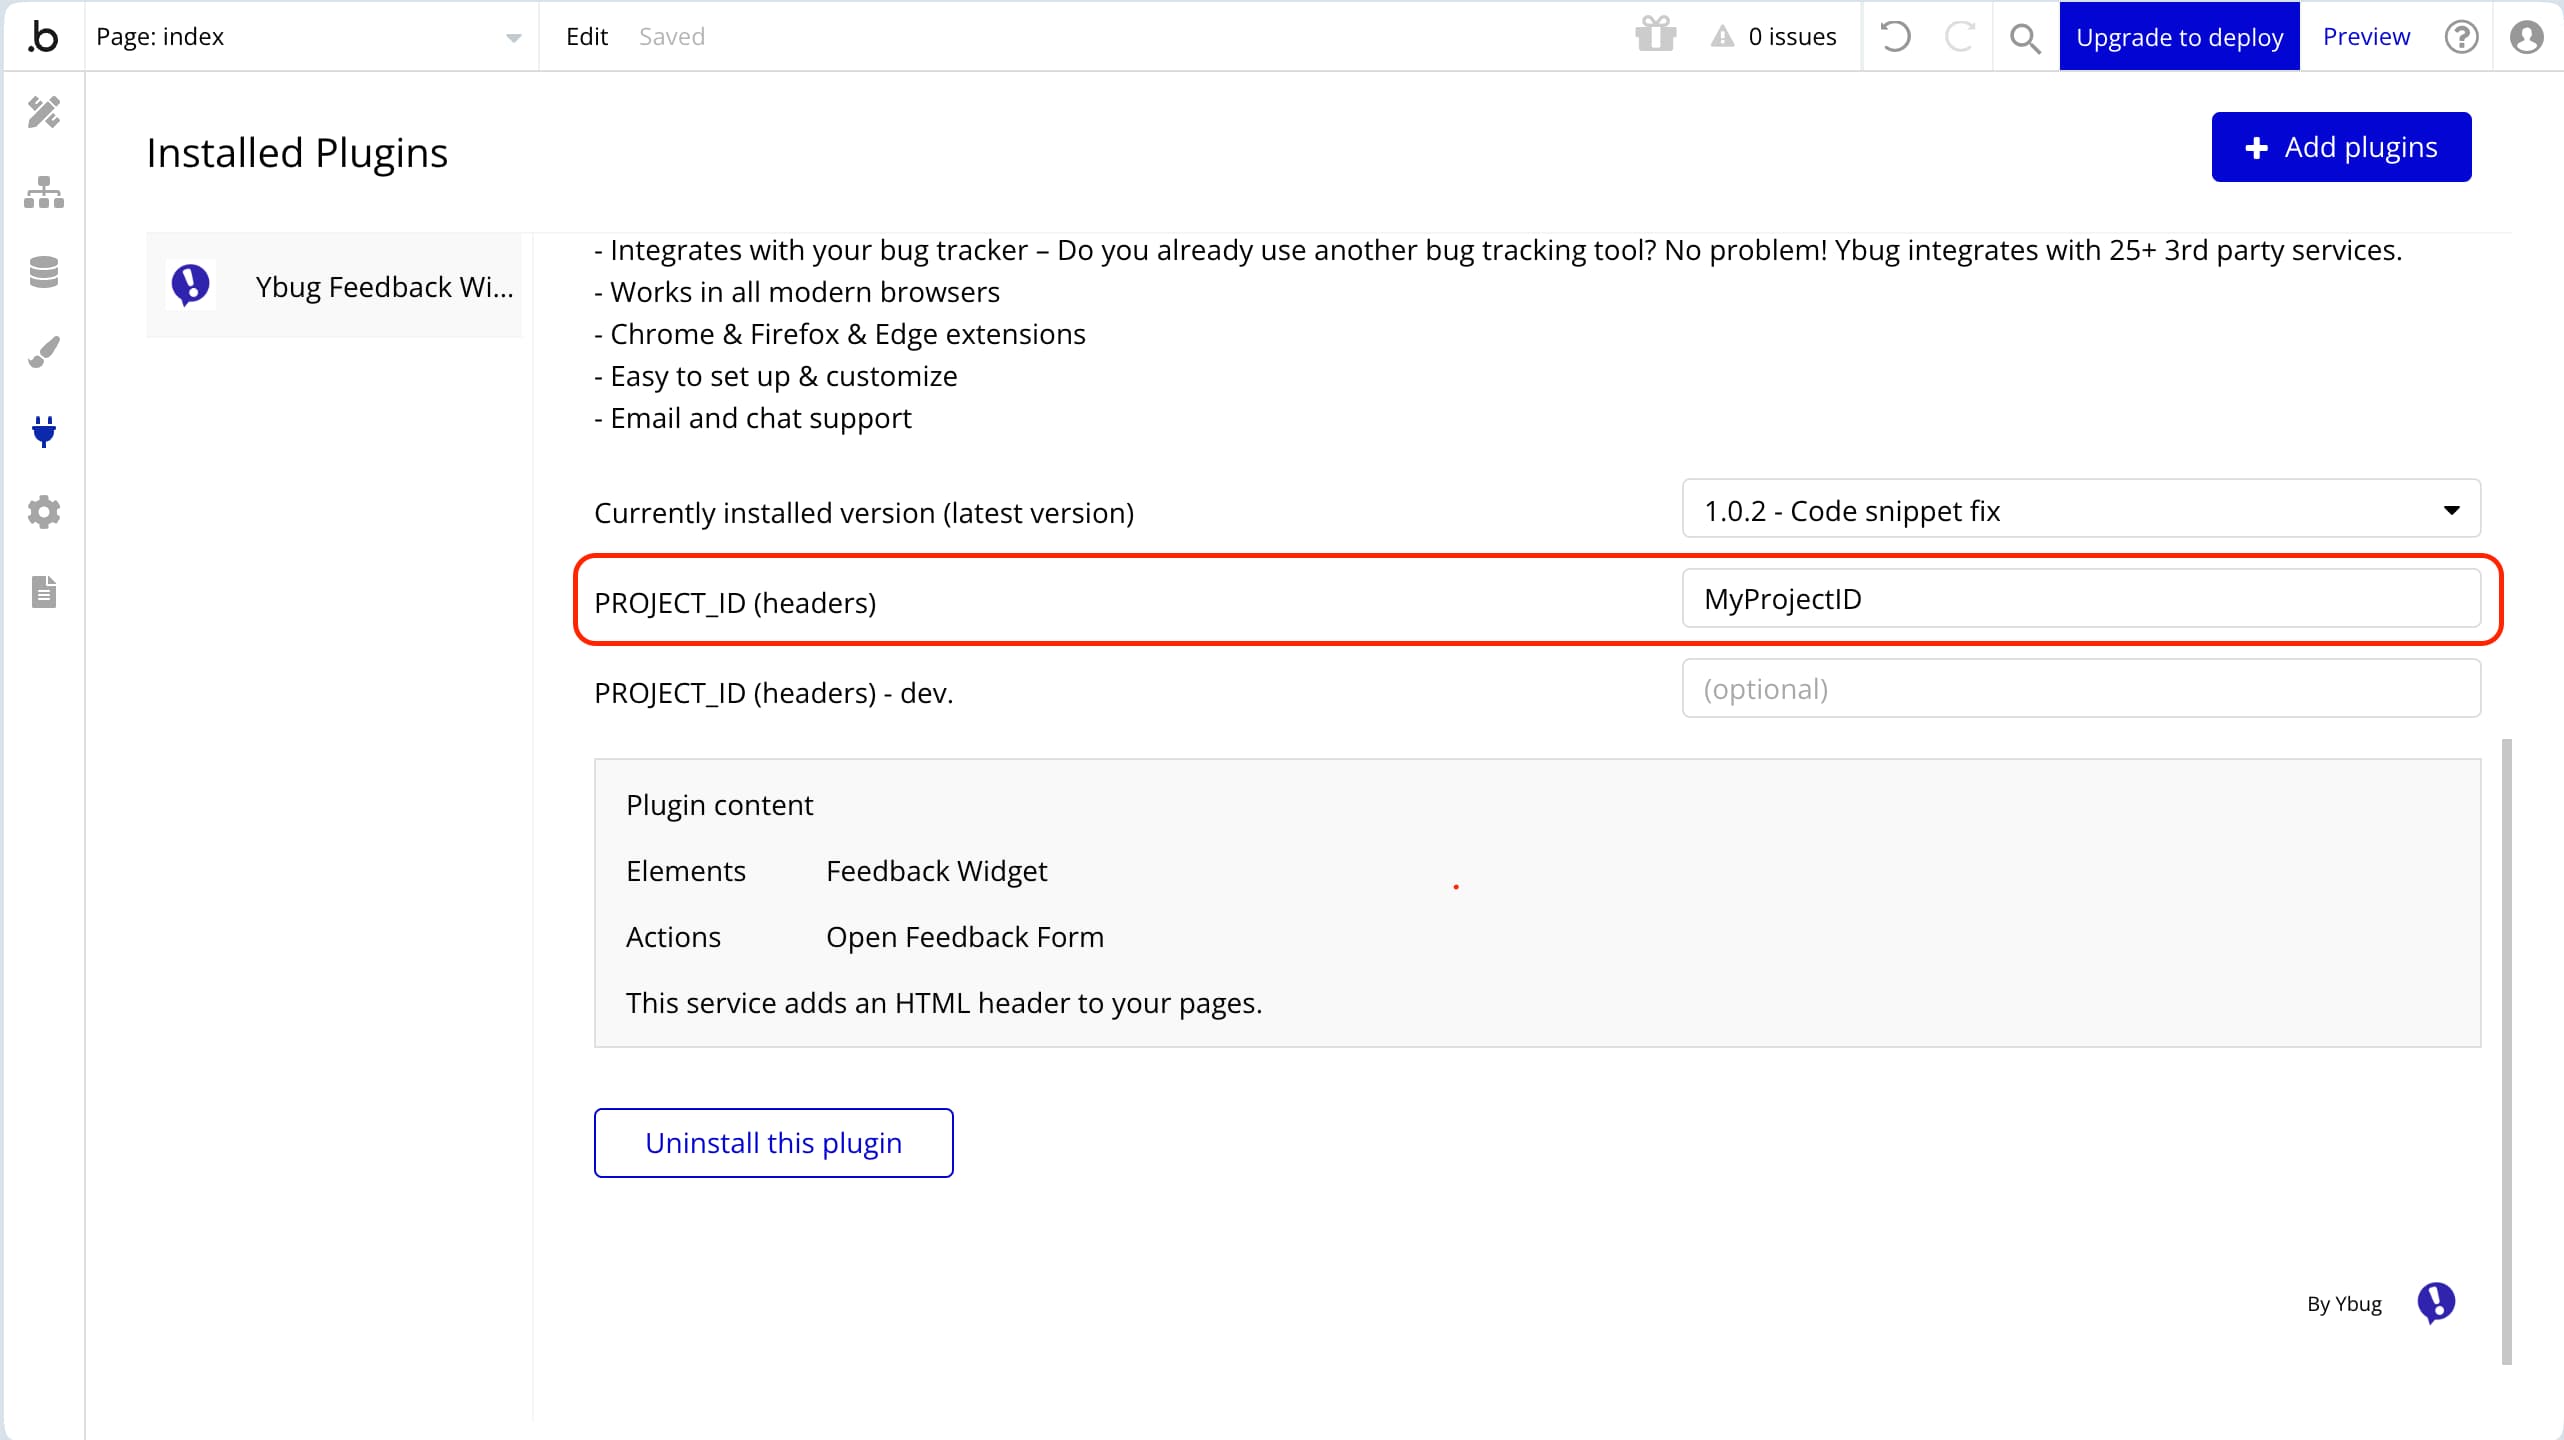
3. Bubble: configure the Ybug plugin settings
3.1 After installing the plugin, go to the plugin settings page within your Bubble app.
3.2 Paste the Ybug Project ID (copied earlier) into the PROJECT_ID field.
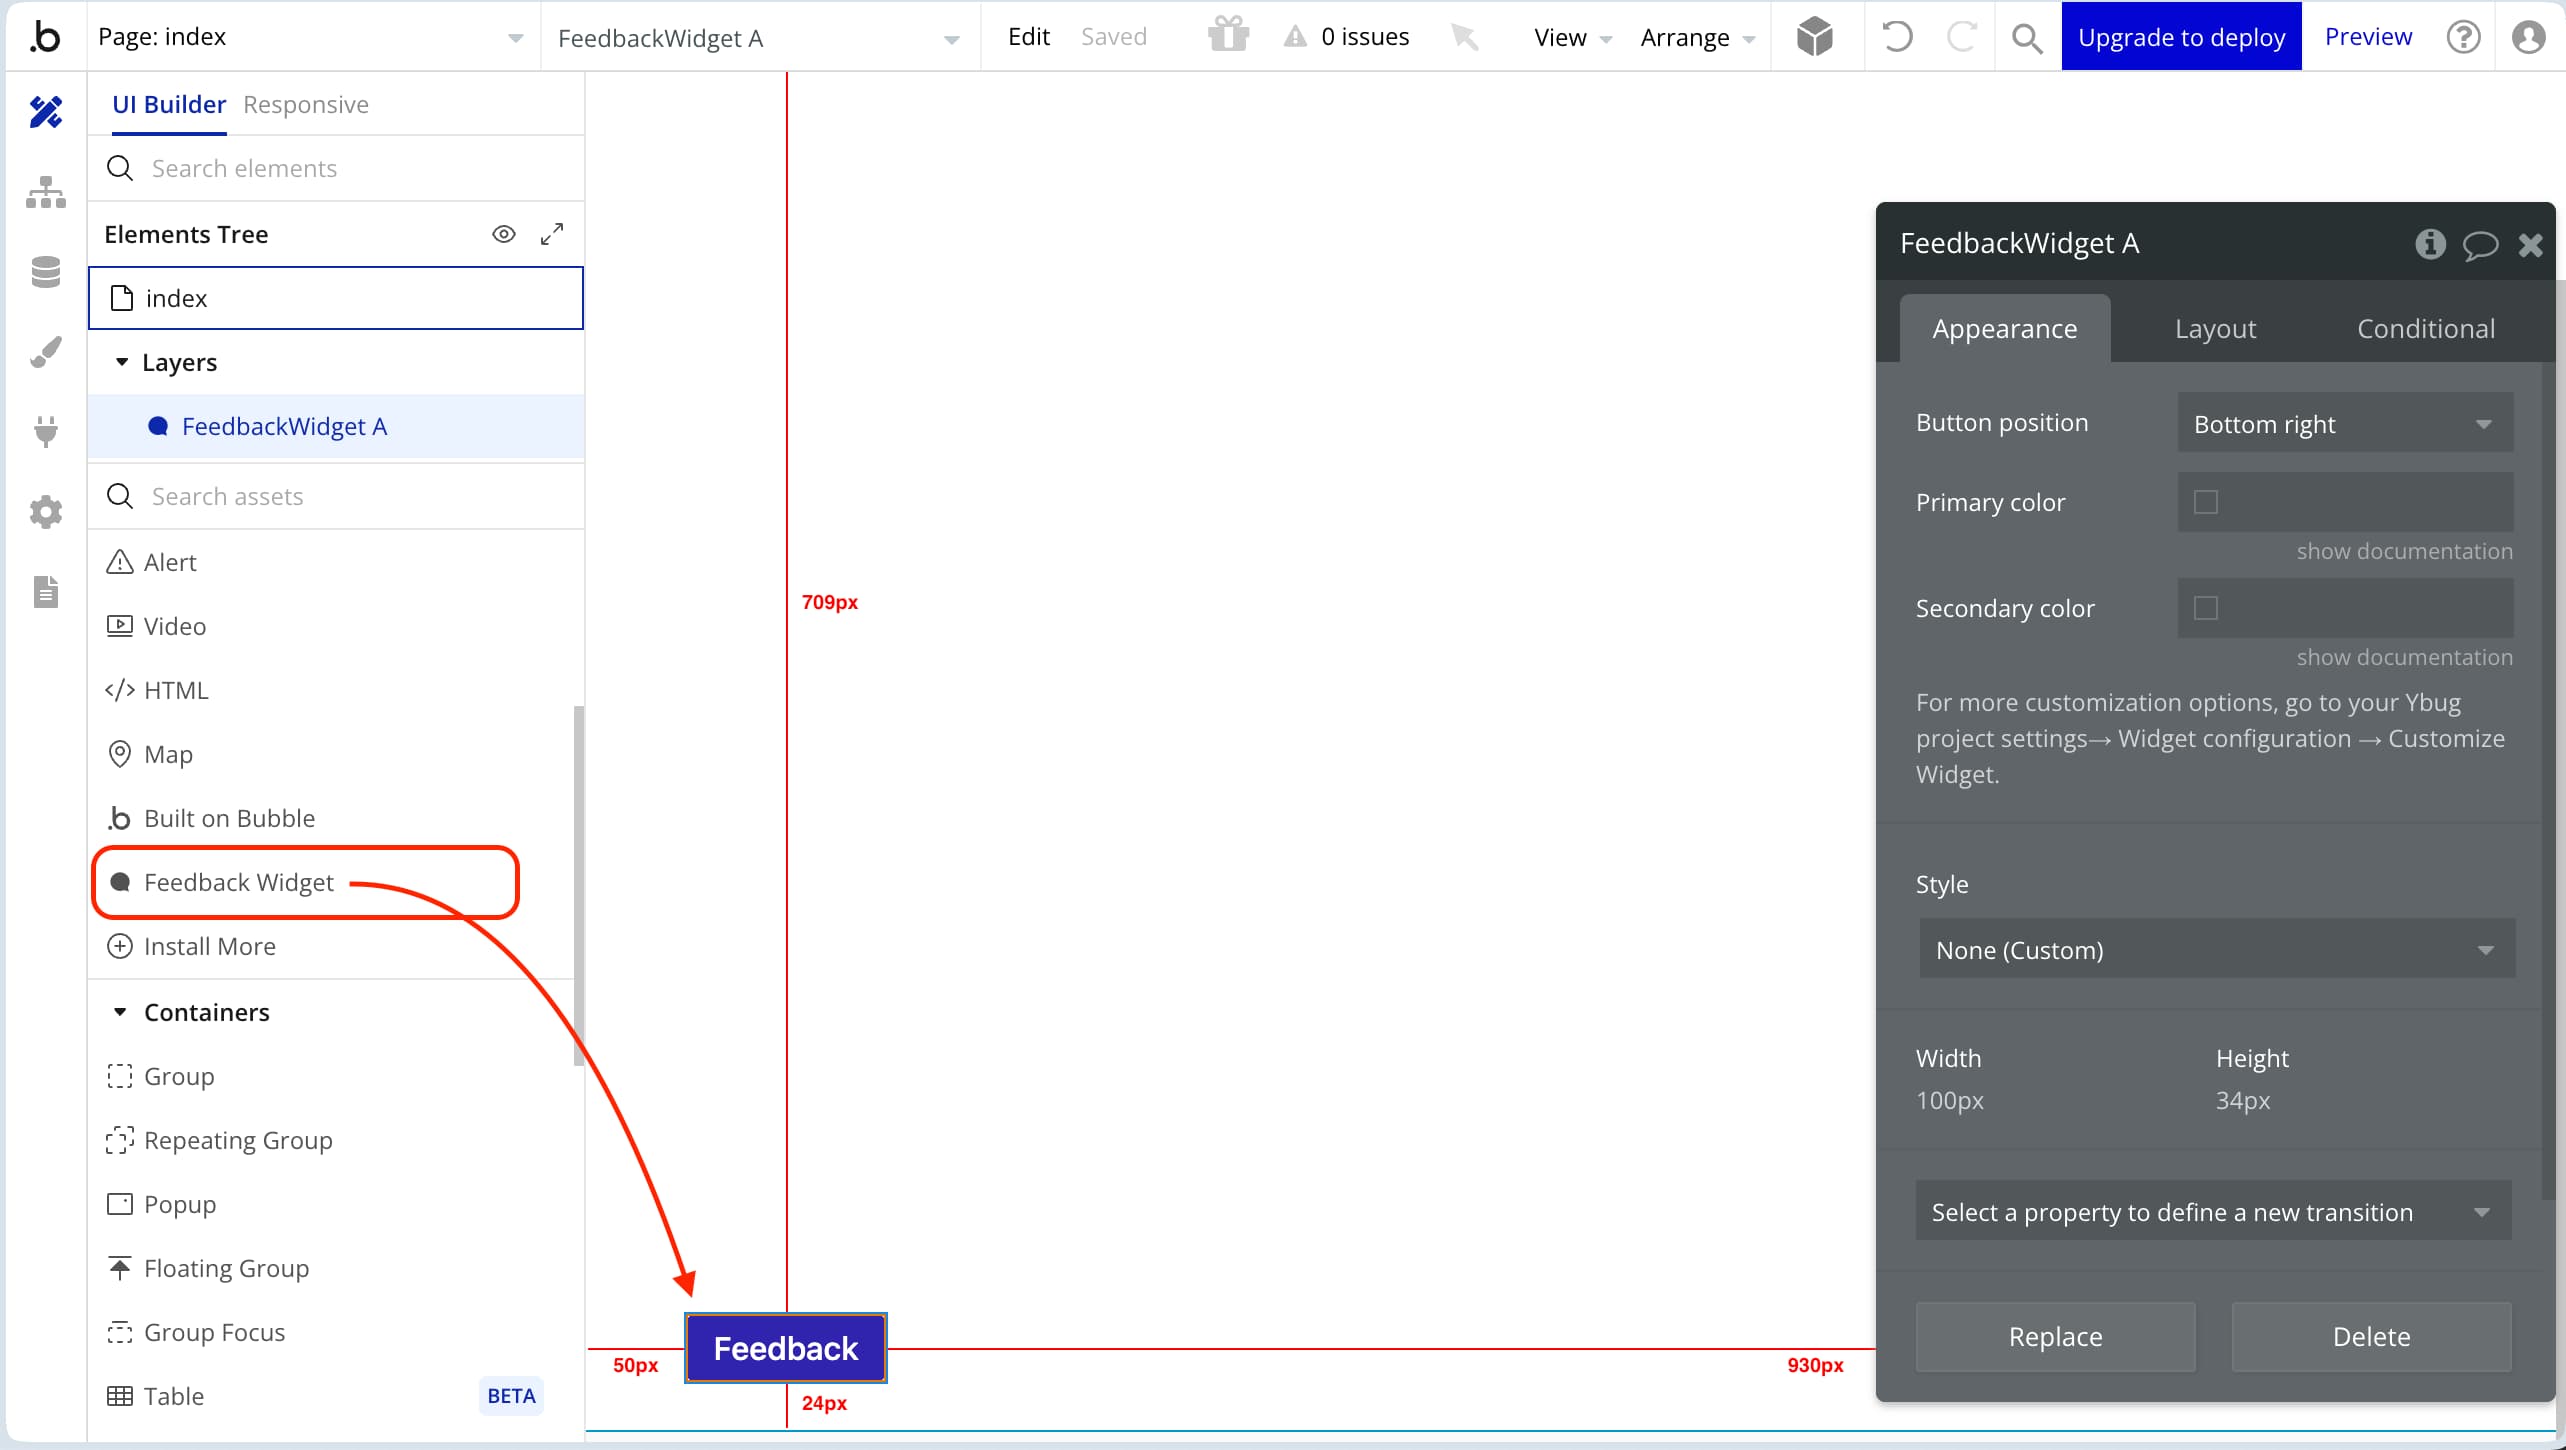
4. Add the Feedback Widget to your page
4.1 In the Bubble editor, go to the page where you want to add the Feedback Widget.
4.2 From the Visual Elements section of the editor, drag and drop the Feedback Widget element onto your page.
4.3 Optionally change the button position and colors on the Appearance tab.
4.4 Preview your app to confirm the Feedback button is visible and functioning as expected.